Cake Toppers(the 29 is going be pretty)

Material Needed
Cardstock
Glue
Photo paper
Foam tape
Loklik ideal studio
Loklik cutting machine


Step 1: Create the desing
1.I uploaded the file to ideal studio (Loklik).
2.I arranged the letters as I wanted.
3.When you have everything the way you want it, select print and cut.
4.I made a pink border and a black one that would be my base to assemble.


Step 2: Mode(print and cut)
1: Print and cut
2: Print in glossy photo paper (8.5x11)
Step 3:Material load type
Cutting mat(12x12 in)(30.48x30.48)

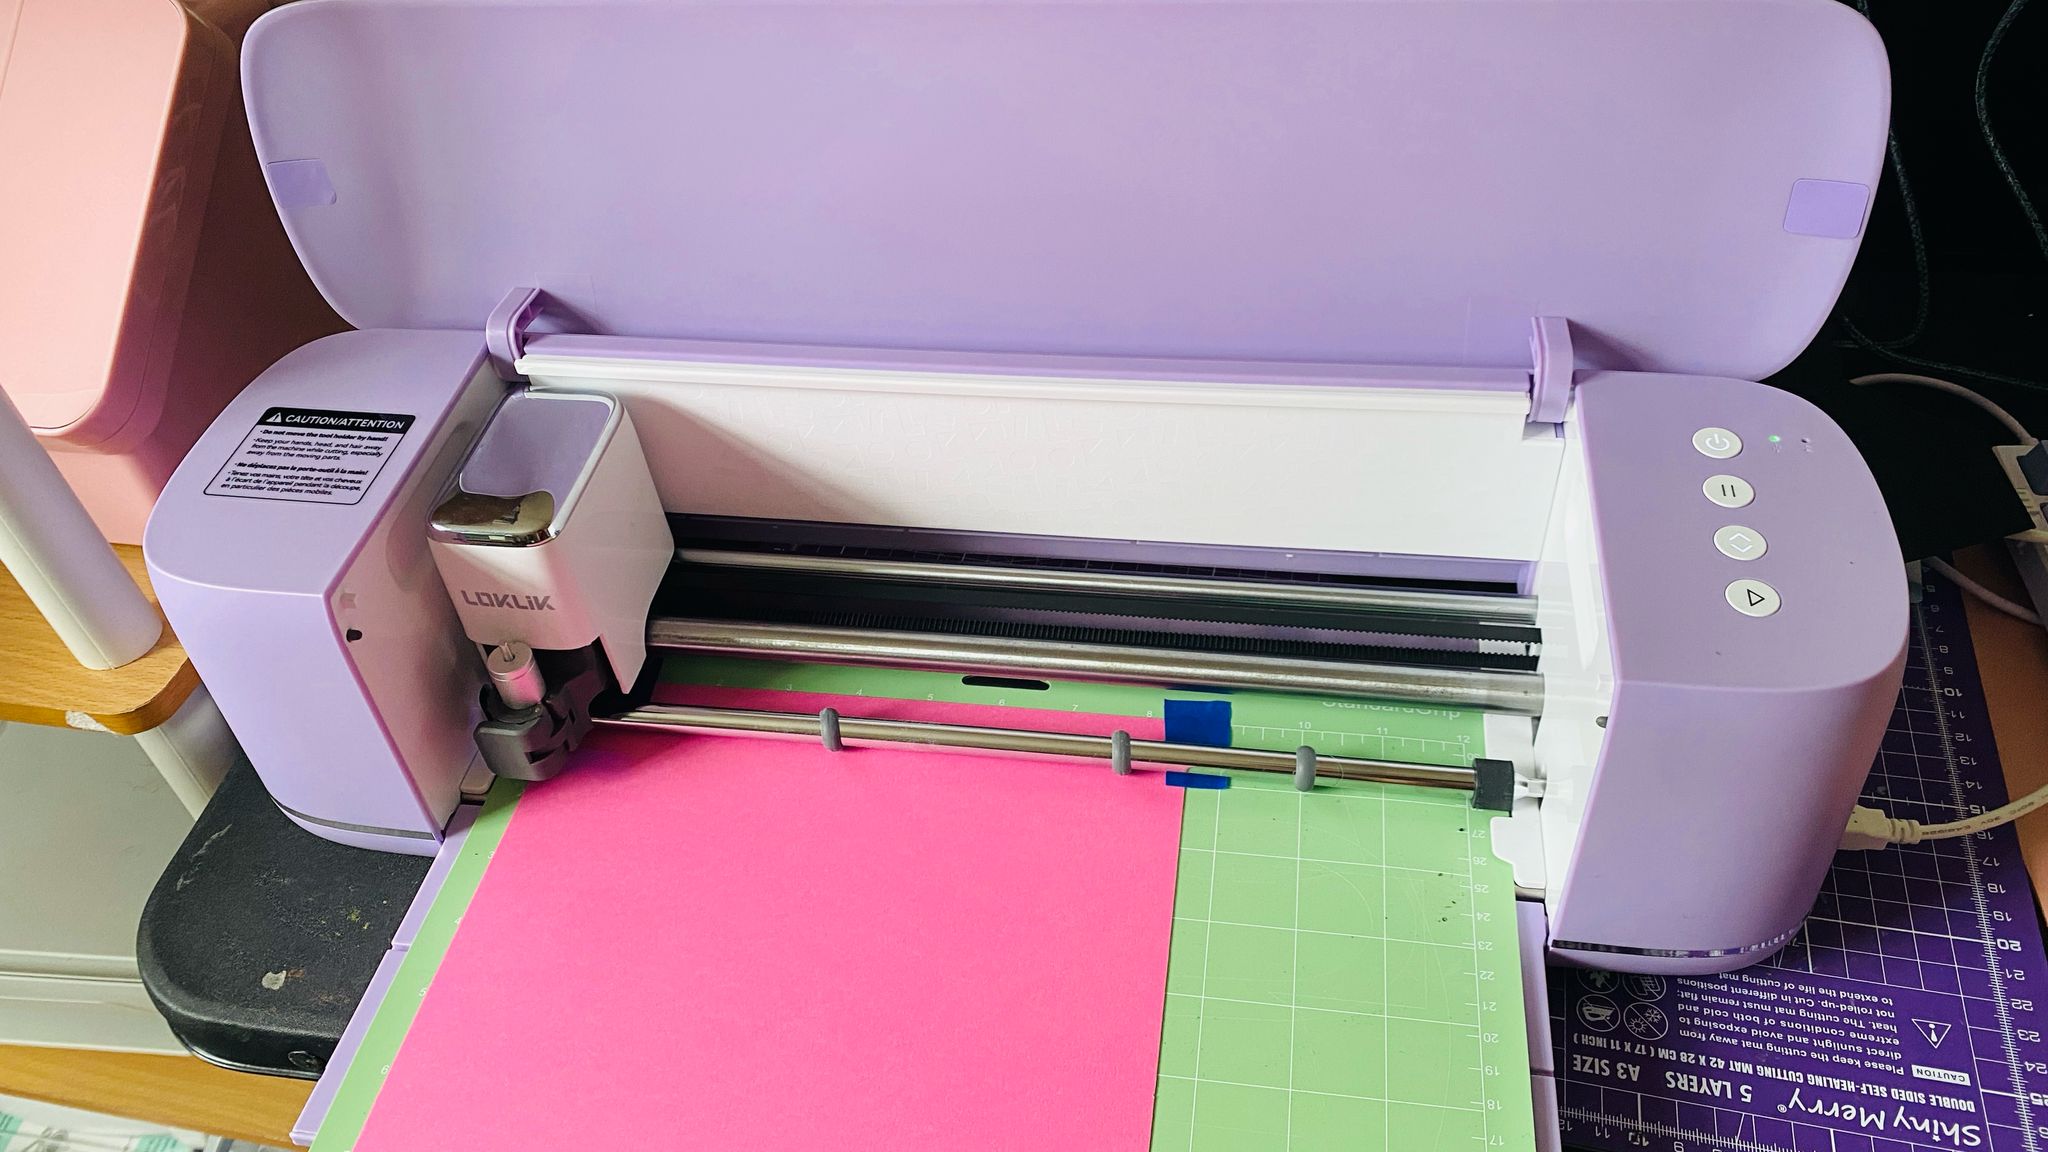

Step 4: Cutting Parameters
1: I made a transparent border around the letters so that I would cut only the edges and not cut letters by letters.


Step 5: Material Parameters
Glossy photo paper
Letter (8.5x11 in)
Force: 7.8
Speed: 7
Passes: 2
Step 6: Assembling

Use glue for the first layers.

Use foam tape for the next layers.

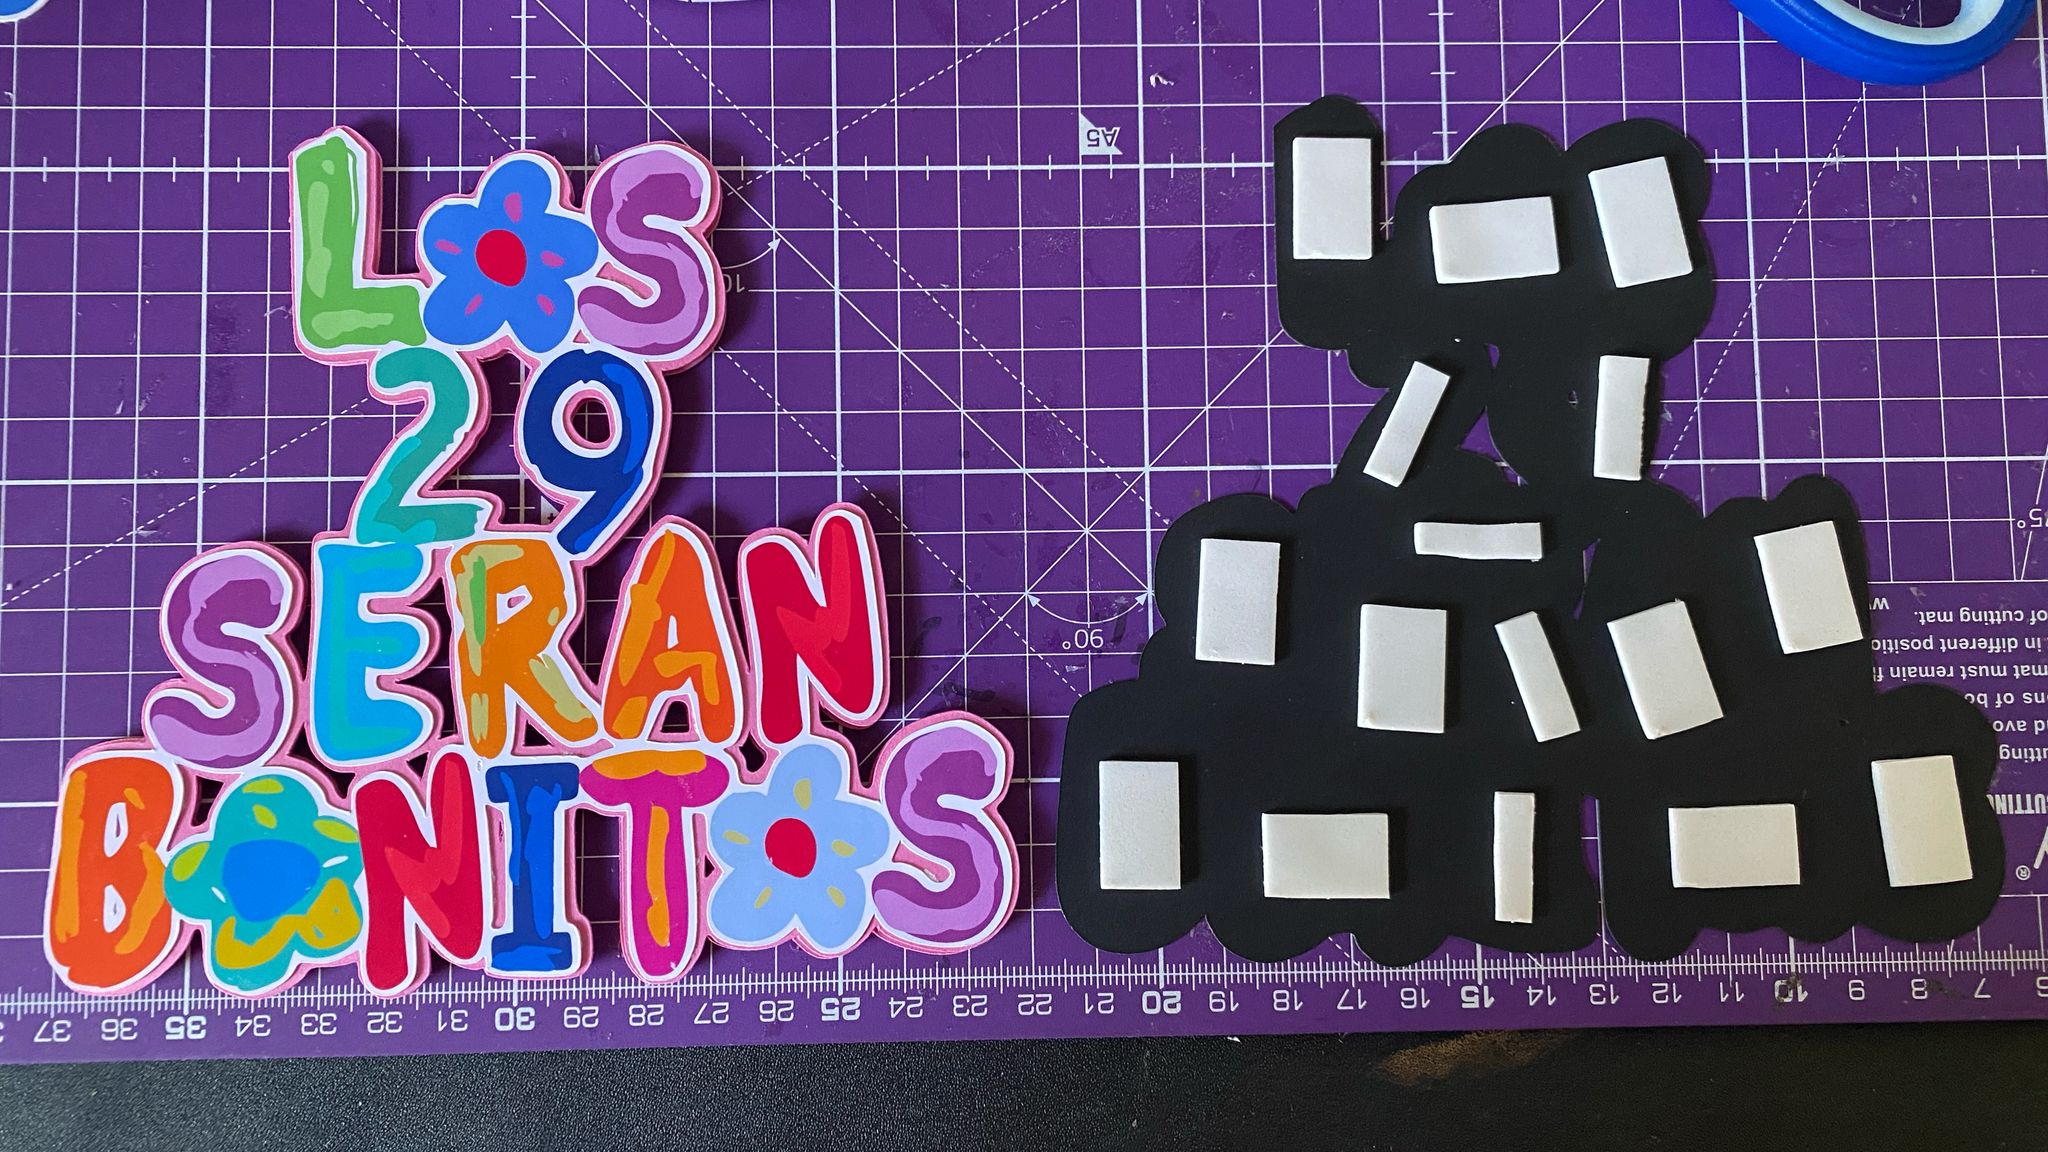

For this part I used foam tape to put a layers on the top of the flowers.

Tips
If you don’t want the cake topper stick to be visible on the outside, what you should do is take a piece of paper, roll it up, and stick it to the second-to-last layer so that when you stick the last layer on, it won’t be visible.